
How do I use Amanote?
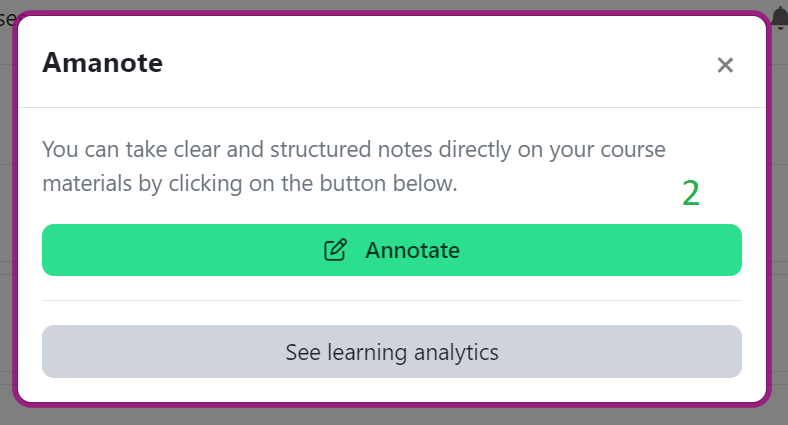
(1) Click on the Amanote icon next to the file you want to take notes on. In this case it is a PDF file.

(2) Click on “Annotate”.
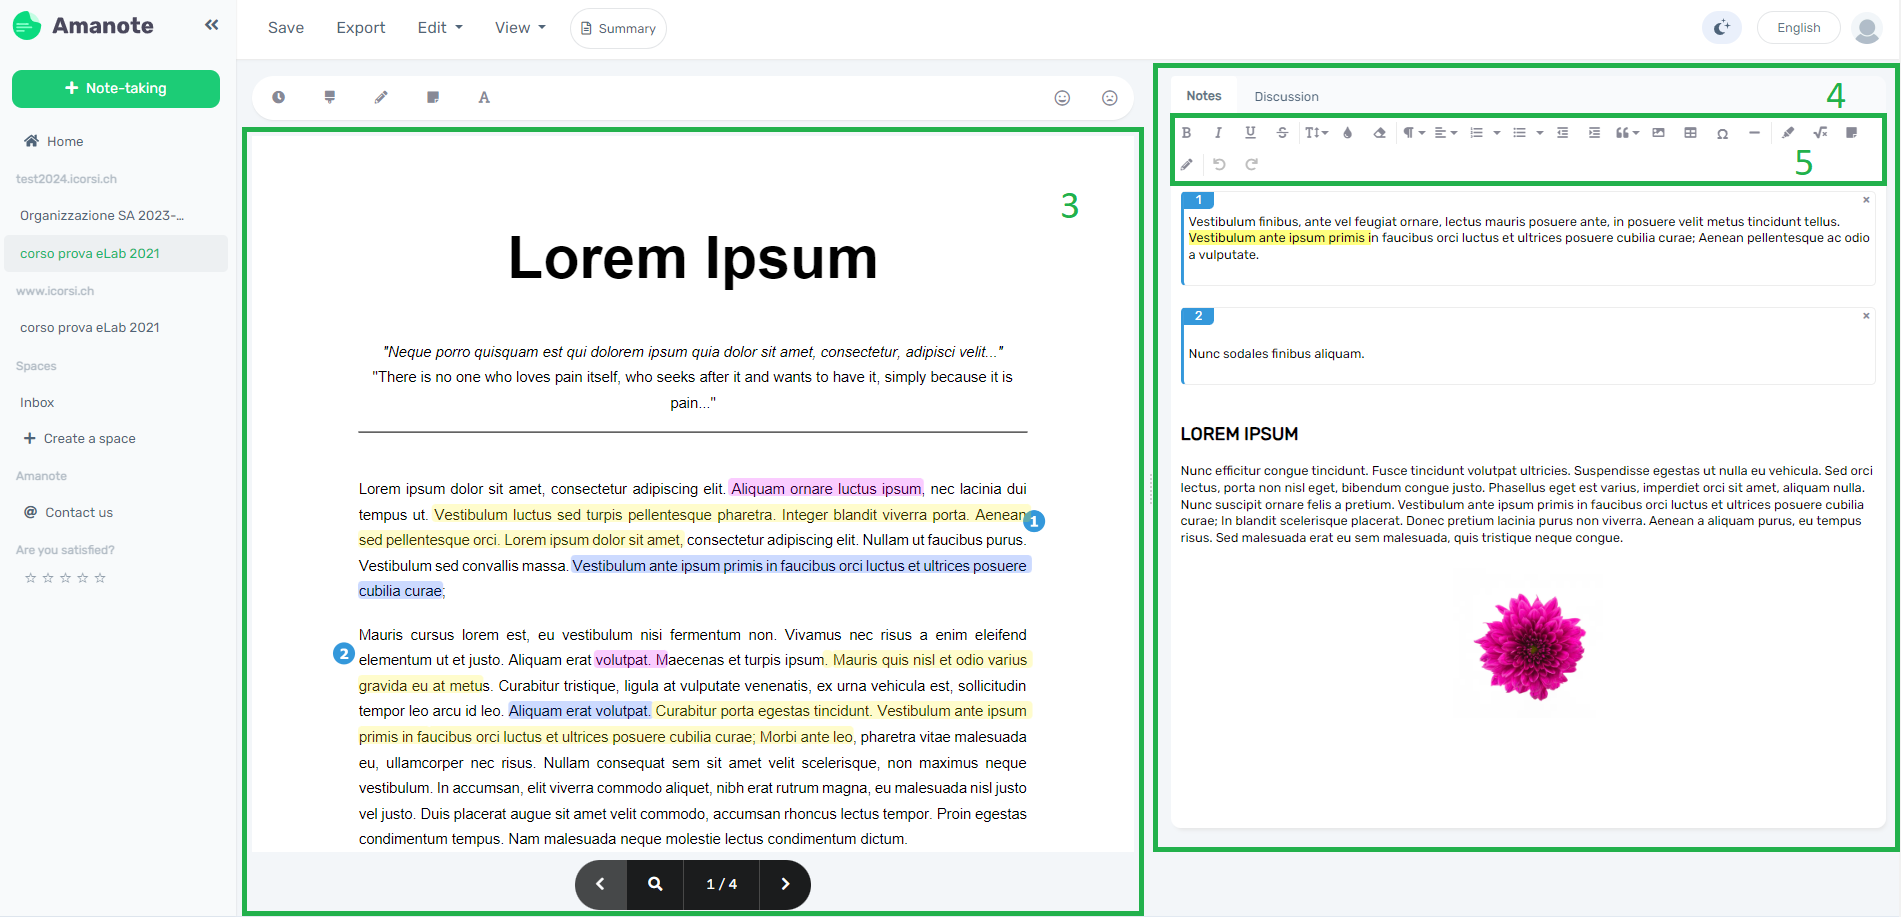
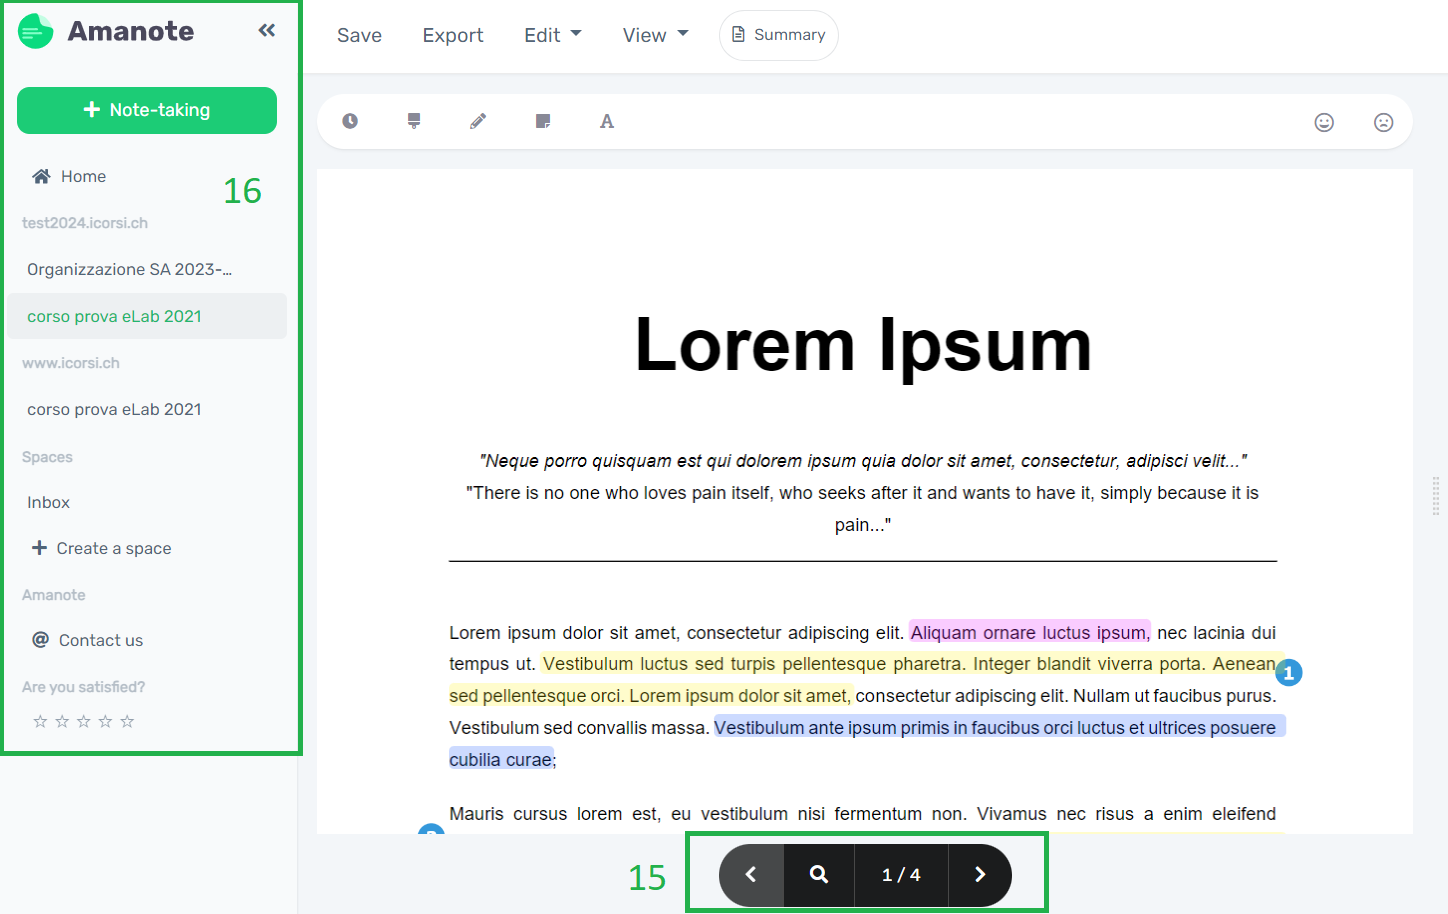
This opens the application showing the material uploaded by the teacher.
In the middle you find the course material (3), while on the right you can see the section dedicated to your notes (you have a notes area for each page of the course material) (4). In the notes section you can write a text (e.g. a summary of the content of the material), but also insert an image, a grid, a mathematical formula and much more with the text editor (5).
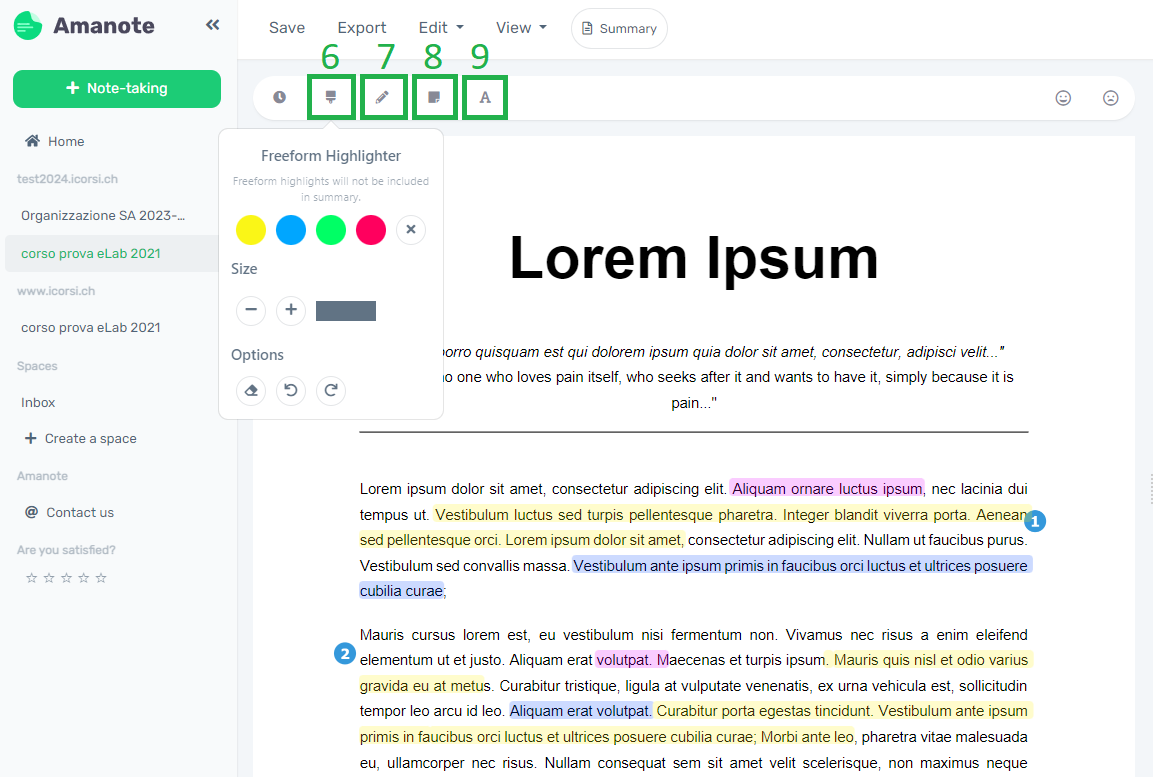
There are several actions you can perform on the course material, for example:
- (6) Highlight part of the text with various colours.
- (7) Draw on the material.
- (8) Add a linked annotation to reference a specific area of the material in your notes.
- (9) Write on the material with formatted text.
The menu bar at the top allows you to:
- (10) Save your notes.
- (11) Export your notes in PDF, Word or Amanote format.
- (12) Change the display of the material and the clipboard page, zoom in or out, and watch a tutorial explaining the functionality of the tool.
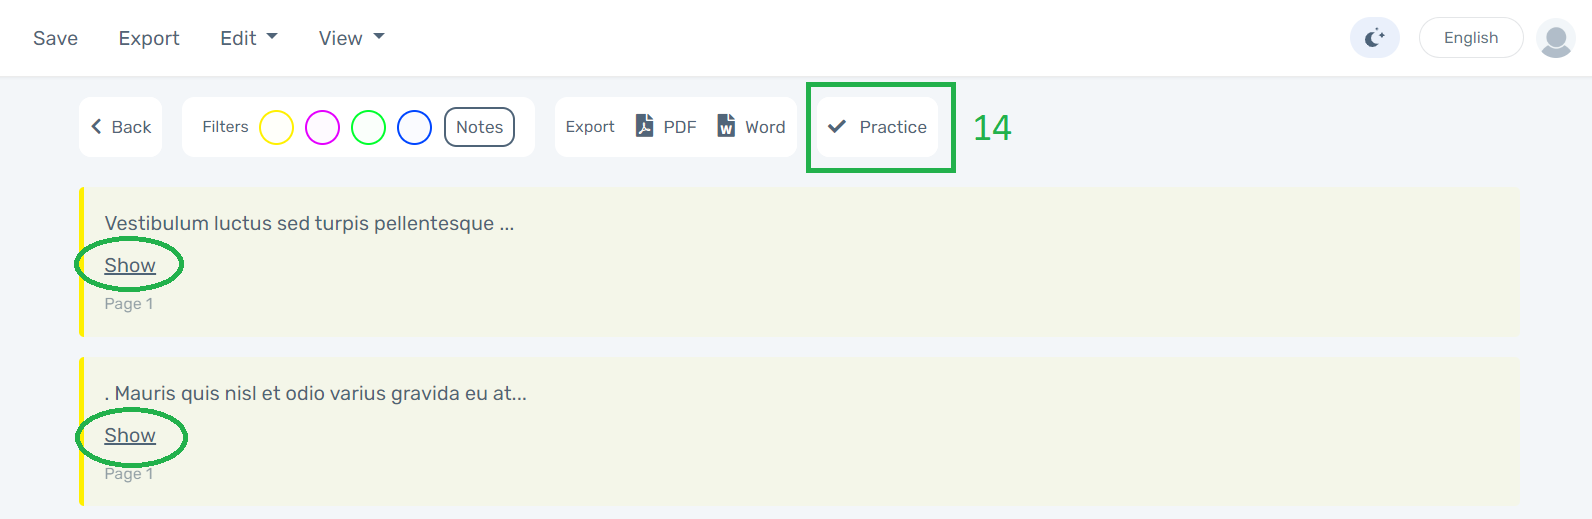
- (13) See or export all your highlights, which can be filtered by colours (e.g. if you highlighted all the definitions in red, you can filter by red to see only the definitions).
- (14) In the “Summary” there also is a practice mode that allows you to test your knowledge, helping you to study for exams.
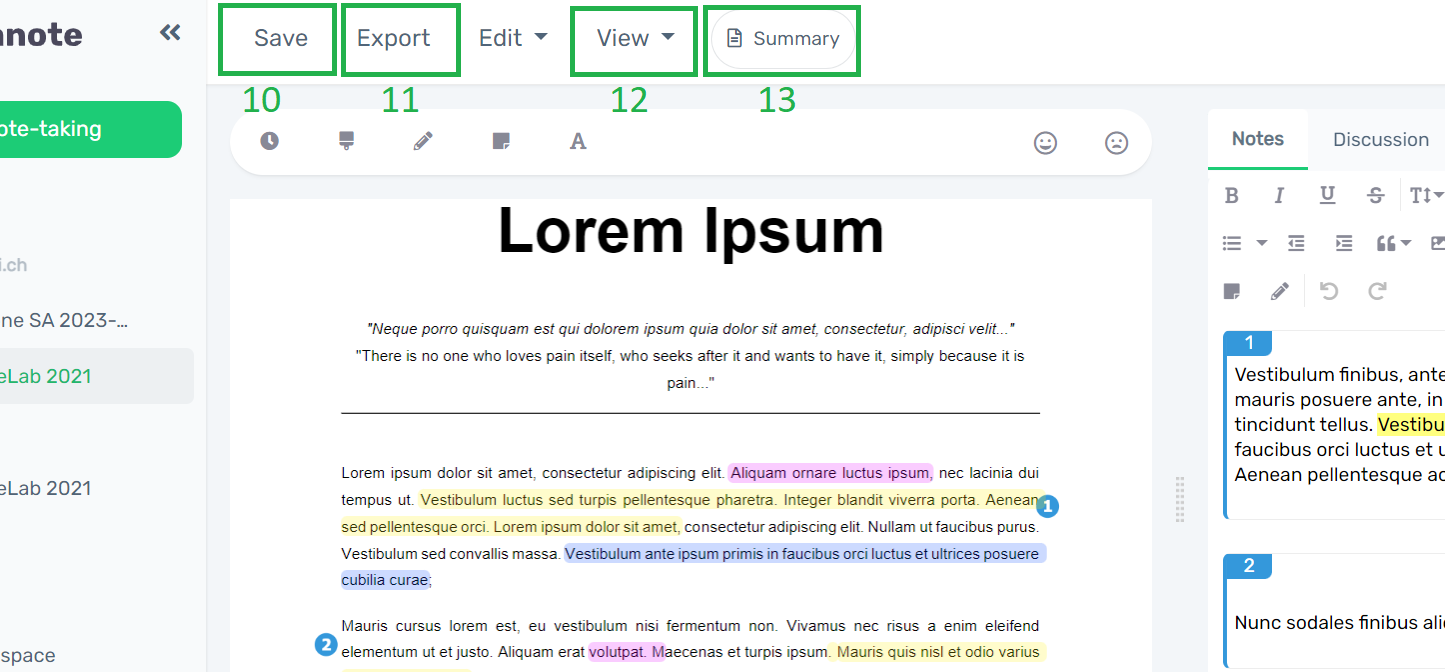
(15) You can navigate through the course material using the previous and next buttons.
(16) Finally, the sidebar on the left allows you to organise your notes in defined spaces, and you can also create your own new sections. You can start a new note by clicking on the “+ New Notes” button.
Last update: 18.07.2024